Rocket Alti is a model rocket altimeter that can tell you with great accuracy how high your rocket flew, how long it took to get there, and how long it took to get back down. It can store up to 16 flights of 512 seconds in length, with 32 samples per second of altitude and temperature data. It has a seven-segment display for viewing flight data in the field. Graphs can be viewed and raw data downloaded in CSV format after flights are uploaded to Eronotix Logbook, a cloud-based flight logging system.
General Considerations
Rocket Alti must be housed in a non-pressurized compartment, as it uses a barometric pressure sensor to measure altitude. If you have a sealed tube, normally just creating two small vent holes should be sufficient to allow the altimeter to get accurate readings. It is also important to shield the altimeter from direct sunlight, as otherwise the accuracy of the pressure sensor can be compromised.
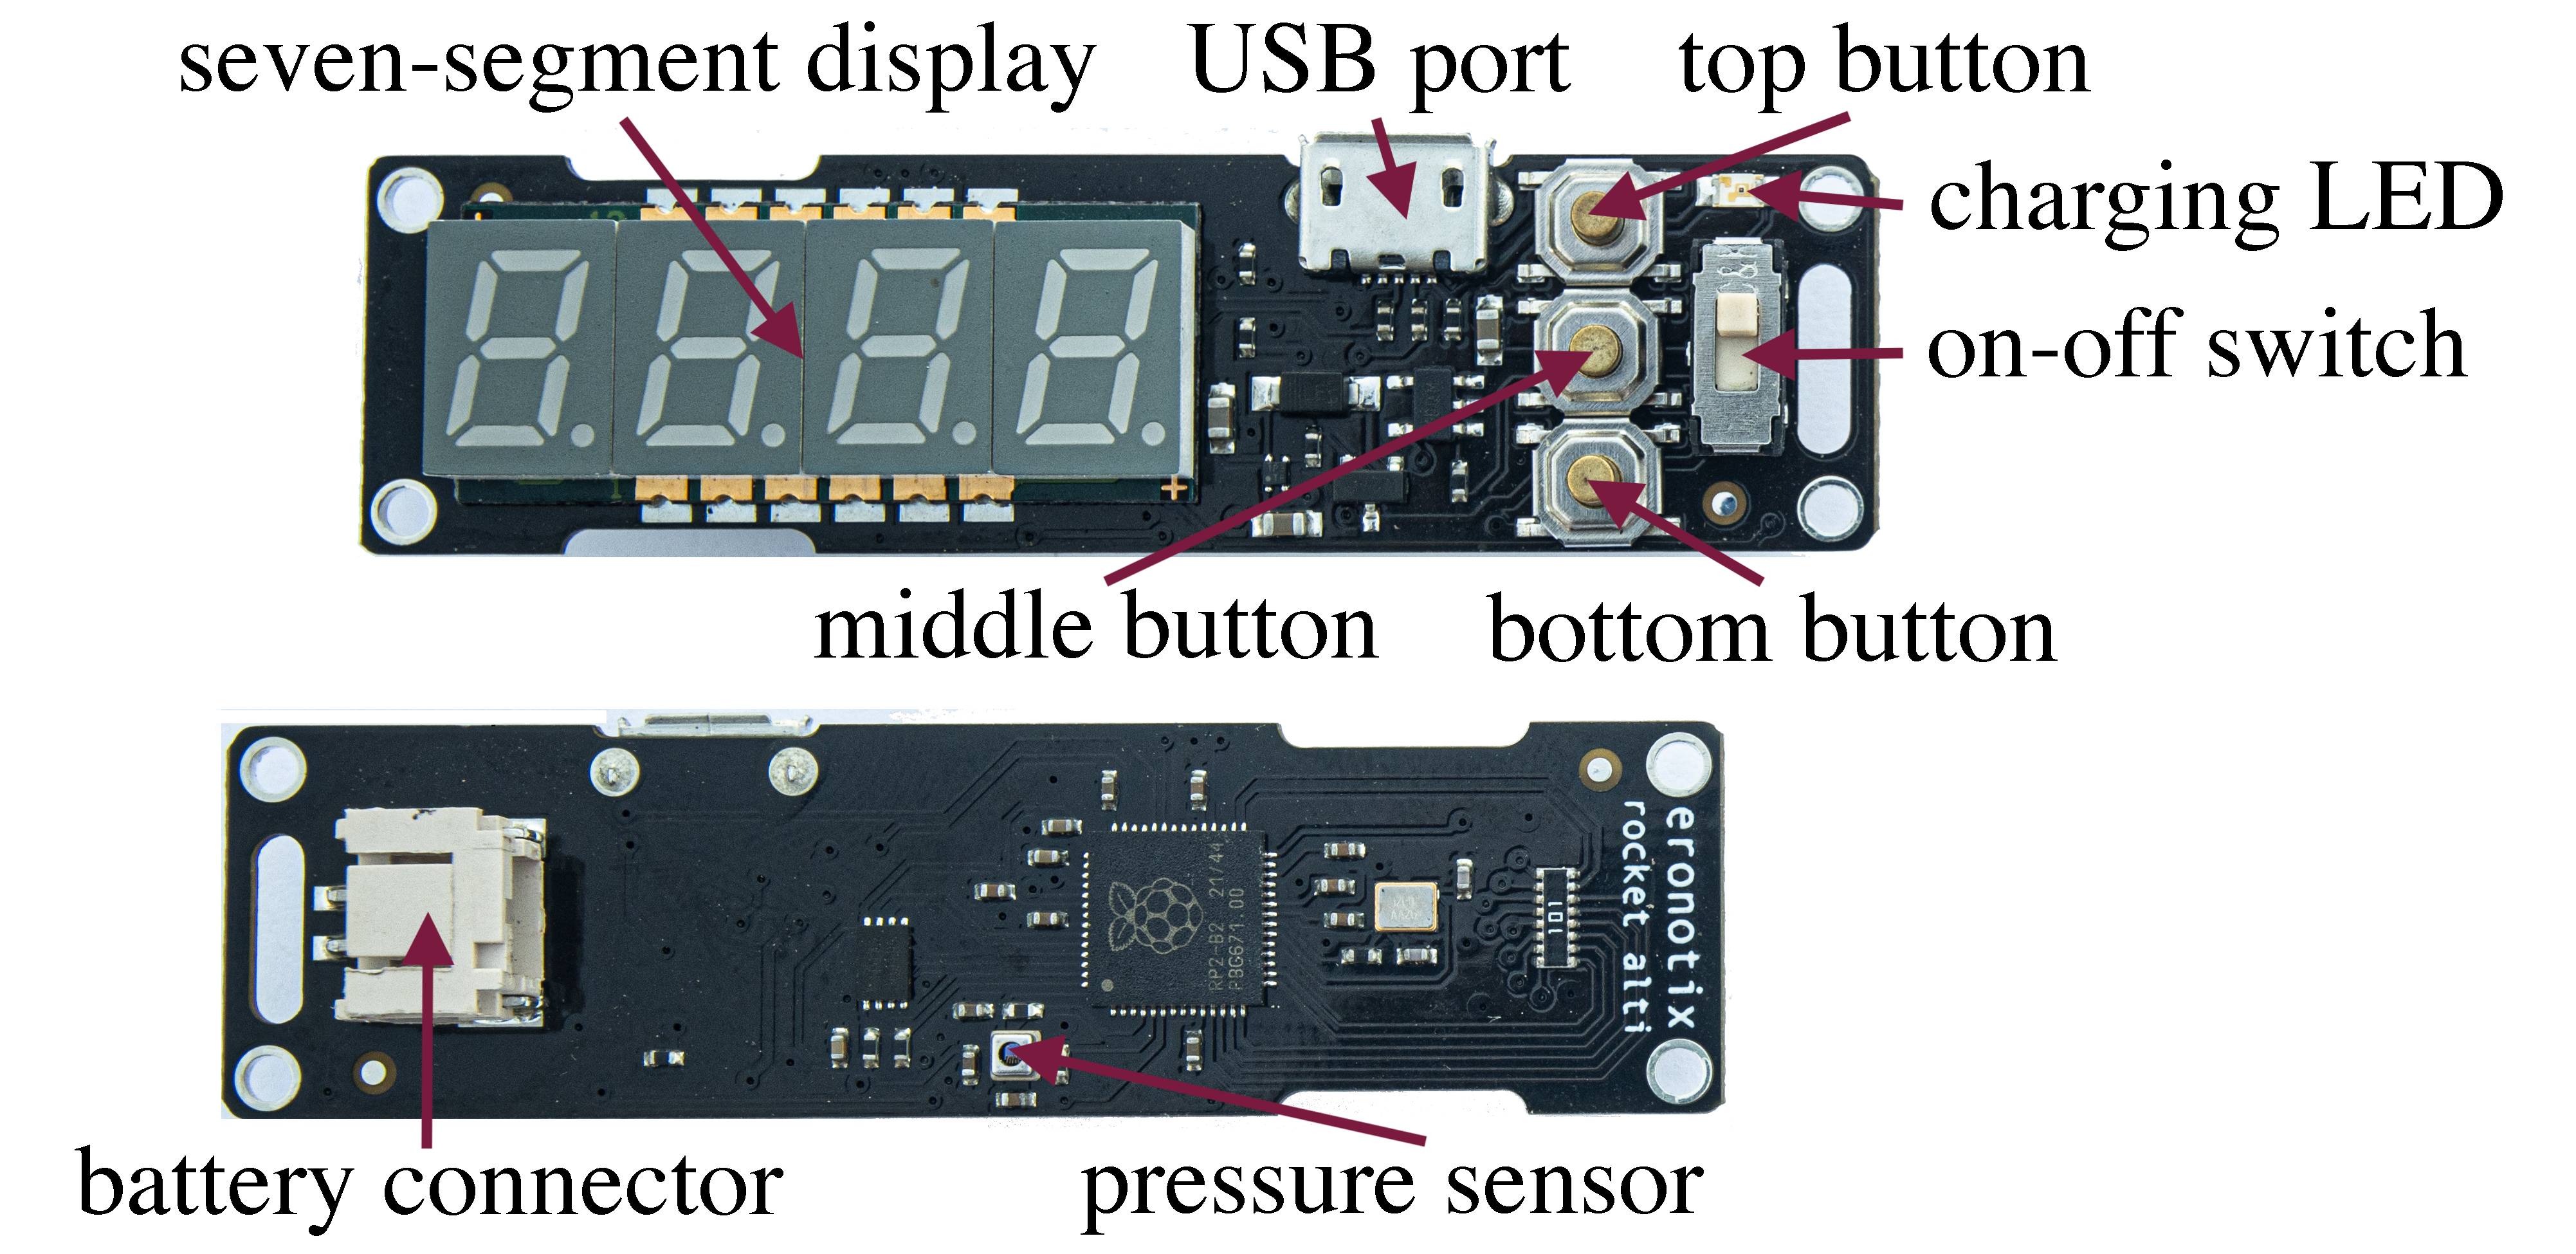
You can charge the altimeter’s battery with the included USB cable before use; the battery takes around 80 minutes to charge when empty. The red charging LED will go off when the battery is full.
If you see FULL when you turn on the altimeter, this means that the memory is full, in which case you can either upload the data off of it to Eronotix Logbook, or erase the flash memory manually. To accomplish this, hold down both buttons while switching on the altimeter until you see ERAS and then DONE.
Rocket Alti is not waterproof, so any contact with water should be avoided. It is designed to be light, but this also means that it is essentially a raw circuit board with no protection. The rocketeer should consider potential situations where the altimeter could come into contact with the ground post-ejection, and the altimeter should be protected from hard impact. Wrapping the altimeter in a light piece of fabric can both protect the altimeter and improve the quality of the readings by reducing the effect of turbulence on the pressure sensor.
Recording a Launch
To record a launch, switch on the altimeter. After a brief display test and a short pause to process flash memory, the battery percentage and firmware are displayed. You will then see a countdown begin from 30 seconds. This lets you know when the altimeter will begin recording for 8 minutes and 32 seconds. It is advised to sync up a timer on a mobile device to this timer, so you know when recording has begun. You can add time in 60-second increments to the timer by pressing the top button. After mounting the altimeter, taking into consideration the factors discussed, a launch can occur anytime within the 512-second time window; most launches take less than a minute from launch to landing. The display indicates REC during the recording time window. If no launch is detected, Rocket Alti will not record any data. No launch under 25 feet will be recorded. To record another launch, the altimeter must be switched off and back on.
Viewing Data in the Field
The apogee (highest altitude reached) in feet, ascent time, and descent time in seconds, are all shown on the seven-segment display after a launch has been completed. You can also scroll through the logged flights in the flash memory by switching on the altimeter and pressing the bottom button during the countdown—this enters the onboard logbook, and then the top and bottom buttons can be used to go back and forth. To exit the logbook, turn the altimeter off and then back on.
Viewing Data with Eronotix Logbook
Eronotix Logbook is a sophisticated online logging system with its own instruction manual and video available here.
Firmware Updates
Firmware updates for Rocket Alti can be found here.
Spare Parts
Spare parts for Eronotix products, such as LiPo batteries for Rocket Alti, are available in the Eronotix Store.
Full Manual
The full manual and instructional video for Rocket Alti are available here.